(11.1) How to Create Product Labels – How to Send Your Products to Amazon’s Warehouse

How to Create Product Labels – How to Send Your Products to Amazon’s Warehouse
Eazyppc welcomes you to the lesson ‘How to Create Product Labels’ – you should read and thoroughly understand the previous lessons, as Eazyppc uses terms and concepts that were explained in earlier posts.
(This guide is intended for Sellers who print and apply labels themselves – if you use Amazon’s label printing and application service, refer to this link)
With Amazon’s logistics system and merchandise sorting process, Amazon warehouse staff do not need — and are not responsible for — knowing what your product is. All receiving, storage, and shipping operations at Amazon’s warehouse are managed through barcodes. Every carton and individual product unit sent to an Amazon warehouse, as well as when it leaves the warehouse to be delivered to a customer, must have the correct barcode applied. Therefore, managing barcodes, printing them correctly, and placing them in the right location is a mandatory requirement.
(!) If a Seller applies the wrong barcode to a product or carton, costly fees will be incurred to resolve the issue. If Amazon ships the wrong product due to an incorrectly applied barcode, the customer will not receive the item they ordered. This not only leads to returns and additional return processing costs, negative customer reviews for the product, and more. Furthermore, to correct the mistake, the Seller may need to request the removal of inventory from Amazon’s warehouse to inspect and reprocess all the barcodes — which incurs yet more costs. If the product is seasonal merchandise, the selling season may be missed entirely.
Therefore, to ensure the process of shipping inventory to Amazon’s warehouse goes smoothly, Sellers should pay close attention to thoroughly verifying barcodes before shipping. In particular, when working with a remote supplier who handles labeling and shipping, the Seller should proactively communicate specific and clear barcode requirements, and request that the supplier provide photos of the products and barcodes for a final (few) rounds of inspection before shipping to the US. This helps minimize misunderstandings and ensures operations run without a hitch.
Item label is a type of label applied directly to each individual product unit – it includes:
- 1 barcode for 1 SKU
- 1 FNSKU code – Each FNSKU is a unique code for one SKU – belonging to one Seller – under a specific condition (new, used)
- Product name
- New/used condition of the SKU
The Seller must ensure:
- Applied to each individual product unit
- Applied to the correct product -> Amazon warehouse staff can scan, identify, and process the product from the moment inventory arrives at the warehouse to when it is delivered to the customer.
- An item label looks like this:
Item Label Printing Process and Notes:
1/ The Seller goes to Seller Central -> Menu -> Inventory -> Manage All Inventory
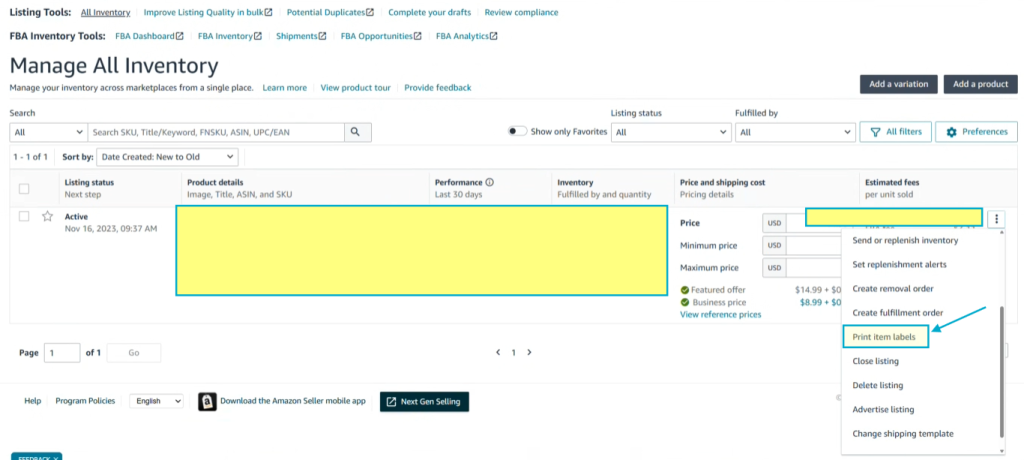
2/ Enter the number of product units to be sent to Amazon’s warehouse
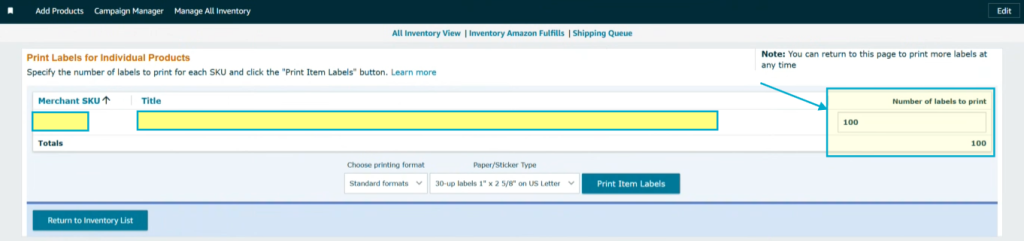
After entering the number of product units to be shipped, the Seller clicks Print Item Labels -> a PDF file will be downloaded.
3/ Process and verify the downloaded file
The Seller opens the downloaded PDF file, which contains the exact number of Item Labels corresponding to the quantity of inventory to be shipped that the Seller entered in step 2.

Note: If the Seller is working with a Supplier who handles labeling and shipping, the Seller should clearly communicate with them and save the file with a clear name (e.g., product name – Seller name) so the Supplier does not apply labels to the wrong products.
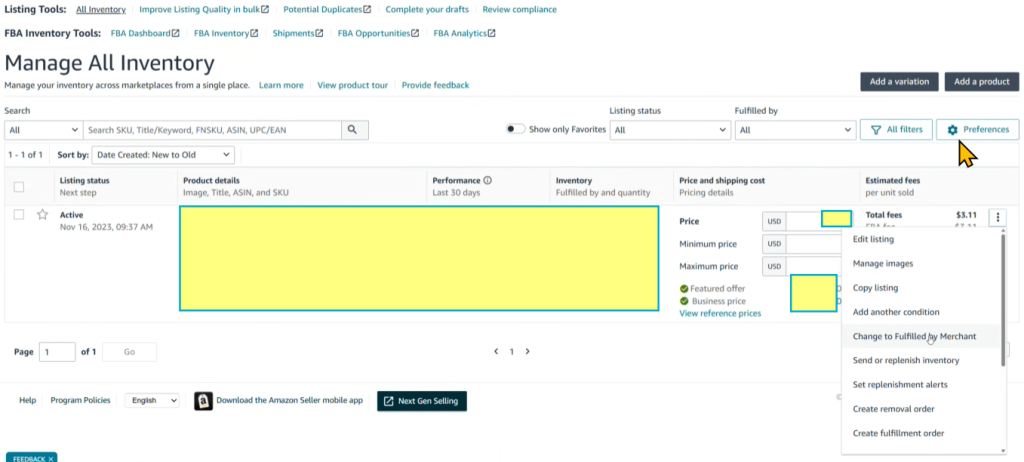
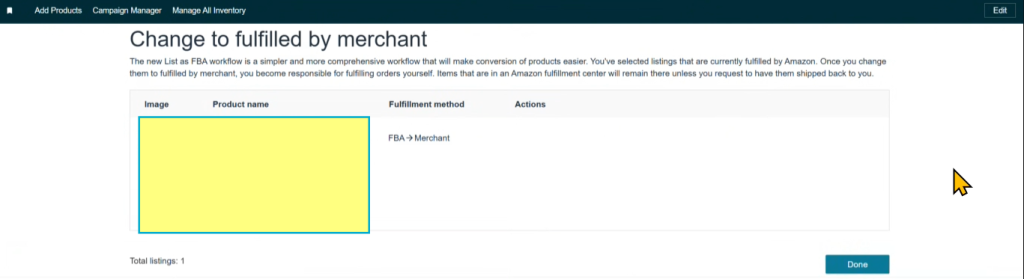
4/ (For new products) Switch the listing status from FBA to FBM
Tip for Sellers to preserve their Honeymoon period:
If the Seller prints Item Labels but keeps the FBA status active, as soon as inventory enters the Amazon warehouse (reserved status) — which does not yet mean the inventory is ready for sale — Amazon updates the Listing to active -> allowing customers to place orders with a very long delivery time -> The Seller will unintentionally lose the priority traffic (Honeymoon period) for the new product.
-> At this point, running ads is not advisable because the long shipping time means customers will not convert.
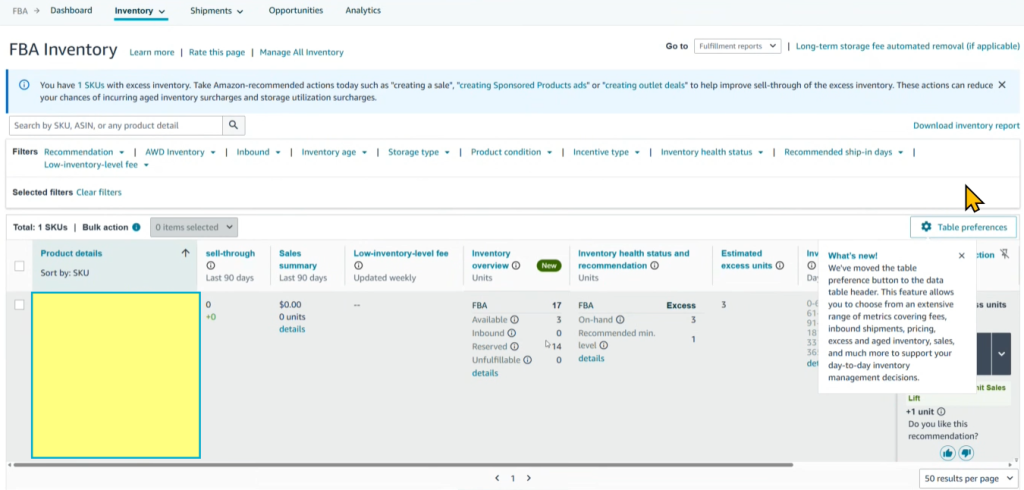
For the SKU/product about to go on sale, after creating the Item Labels, the Seller should switch the status from FBA -> FBM (so that the available quantity for sale is 0). Afterwards, the Seller can monitor the incoming inventory under FBA Inventory -> The quantity Amazon is ready to ship will appear under Available – at that point, the Seller switches the status back to FBA. -> The Honeymoon period is preserved.
Switch FBA -> FBM
FBA Inventory -> monitor incoming warehouse inventory
Tất cả nội dung trên blog này chỉ nhằm mục đích cung cấp thông tin và chia sẻ kinh nghiệm cá nhân về kinh doanh trên Amazon. Eazyppc.com không đảm bảo bất kỳ kết quả cụ thể nào từ việc áp dụng các chiến lược hoặc thông tin được chia sẻ.
Việc kinh doanh có thể tiềm ẩn rủi ro, và mỗi cá nhân cần tự nghiên cứu, đánh giá trước khi đưa ra quyết định. Eazyppc.com không chịu trách nhiệm đối với bất kỳ tổn thất, thiệt hại nào phát sinh từ việc áp dụng thông tin trên blog này.


Chấp thuận Điều khoản & Chính sách
Trước khi tiếp tục truy cập website Eazyppc.com, bạn vui lòng đọc và đồng ý với: